Showing posts with label daily menu. Show all posts

Monday, October 10, 2016

Ayam Bumbu Rujak


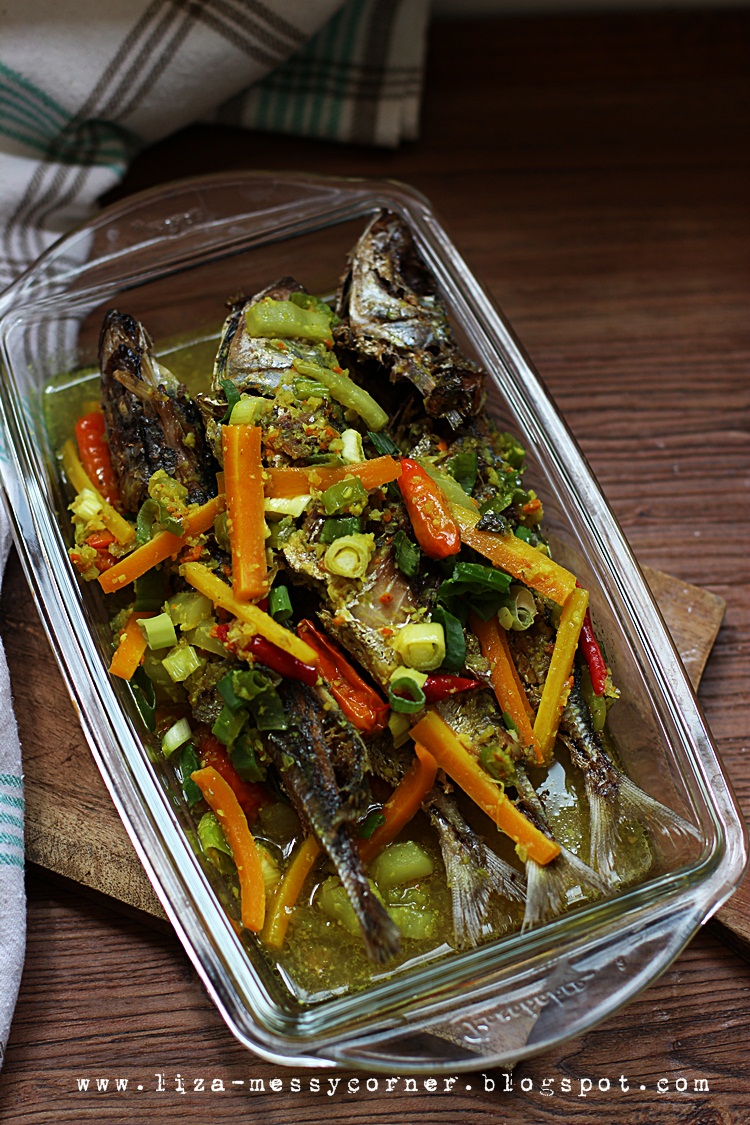
Again, this is one of our favorite menu. And again, it is very easy to make. The original ayam bumbu rujak, you usually need to half baked the chicken first before seasoned it with the ingredients. I cut the process and have my own way. Just to make it simple. This is my mom's recipe with a little twist from my side. If you wish to read the recipe in Indonesian, check my instagram account : https://www.instagram.com/elizasetiawan/

For this recipe, I am using big red chilies as it has lower level of spiciness, my two sons love this menu but they can't stand too much heat from other kind of chilies. I use 2 whole chicken (cut into 8-12, depends on how big the chickens are) as my family loves it so much. I usually divide it into 2 food containers. 1 container to be put in the refrigerator, and the other one for the freezer. So whenever I am too lazy to cook anything, I just thaw my stock from freezer. Saves time and effort :D


INGREDIENTS

2 chicken, each cut into 8-12 depending on the size of the chicken
500ml coconut milk
3 tbsp oil
1 lime

10 kaffir lime leaves
5 lemograss, use only the white parts
5 bay leaves
4cm fresh galangal, mashed

50 gr palm sugar (Indonesian: gula merah)
2-3 tsp salt
2 table spoon juice of tamarind pulp

Grind into spice paste:
15 big red chilies
20 shallots
10 cloves of garlic
1 tsp of ground coriander
1 tsp shrimp paste


How to cook:
1. Clean the chicken, rub the skin with lime and a little salt. Let sit for at least 15 minutes. Wash clean
2. Heat oil in a wok/large frying pan with medium heat. Add in the spice paste, then the galangal, kaffir lime leaves, lemongrass, bay leaves. Saute until fragrant. Add in the chickens, saute until the chicken is no longer pink.
3. Pour the coconut milk and bring to a boil, add in the salt and palm sugar and juice of tamarind pulp. Lower the heat.
4. Cook until the water absorbed, and the chicken is tender 
5. Prepare an anti stick pan, add a teaspoon of cooking oil, and cook until both side is caramelized and a bit brown. Ready to serve.

Sunday, October 5, 2014

Nasi Tim a.k.a Steamed Rice a.k.a Rice Topped with Chicken and Mushroom


Honestly I don't know what this dish' name in English. So I want the title to be as informative as it can be, as this food is quite famous in our country, it is actually a mix Indo-chinese comfort food. Well, nasi tim often said to be the food for toddler and the seniors people. You know why? Because it has a smooth texture, easy to chew. Mild taste, but heavenly in your taste bud. And when people got sick, nasi tim is commonly found on the menu list. I also crave for this food when I was hospitalized back in 2009. Well of course to labeled it "food for toddler and senior" is not a fair judgement, as this dish is delicious that you can have it not in a specific age and condition.

There are many ways to make delicious nasi tim ayam, what I'm going to share is my version of nasi tim, the way I comfortable to make it, a.k.a the simple way, if you know what I mean *wink*.

It seems like there are so many stages, but if your cooking mood is up and down (like me), you can make a big batch and keep some of it in the fridge. Whenever you are in a hurry and feeling like making breakfast is such a burden, just heat them and you're safe from grumble-cooking time. Oh wait, that's me! Suit yourself with your own condition LOL
Oh, btw, I have never keep this dish in the fridge for more than 3 days, I think its best not to keep it too long. This what I do to fridge it, once the nasi tim is cool/room temp, transfer them to an airtight container. And you can re-steam them for 10 minutes before serving, or simply reheat with microwave. Of course the texture will be slightly different after microwave re-heating. Lack of moistness is happening, though you put a glass of water during the heating period.


Ingredients :
For chicken stock
chicken bones (i use 2 breast bones and 4 pcs of chicken feet)
2 L water

For Rice 
- 650 gr rice
- chicken stock, the amount of the stock should be as stated on the rice package cooking direction (i'm using 1 L of chicken stock)
- 3 cloves of garlic, mashed and finely chopped
- 1cm ginger, mashed and finely chopped
- 1 tsp salt
- 1 tbsp light soy sauce
- a dash of sesame oil
- 1 tbsp of oil

For chicken
- boneless and skinless chicken breast (I use 2 chicken breast @200-250 gr), cut into cubes
- gr mushroom, I'm using fresh  mushroom, but canned mushroom also ok
- 5 cloves of garlic, mashed and chopped finely
- 2 cm of ginger, mashed and chopped finely
- 2-3 tbsp of cooking oil
- 4 tbsp sweet soy sauce
- 3 tbsp light soy sauce
- 1 tbsp oyster sauce
- 2 tbsp sesame oil
- 250 ml water
- salt and pepper to taste

For soup
- 500 ml chicken stock
- 2 cloves of garlic
- 2 scallion, thinly slice
- salt and pepper

I'm also adding 12 hard-boiled quail eggs.

Directions :
Chicken stock
- Bring to the boil, about 2 cups of water. Add in the chicken bones. Reduce the heat, cook for about 5 minutes. Remove all the water. 
- Add 2 L water to your pan with all the bones
- Bring to the boil with medium heat, after the water is boiling, reduce the heat. Simmer for at least 1 hour

Rice
- Saute the garlic and ginger until fragrant, turn off heat.
- Use chicken stock as the liquid to cook the rice, the amount should be the same as the instructions. Add in the garlic and ginger saute, salt, light soy sauce and sesame oil. Cook until done, I am using stove top method, took about 15 minutes

Chicken and mushroom
- Heat the pan and saute the garlic, ginger until fragrant. 
- Add in the chicken cubes, saute until the color changed
- Add in the mushroom, saute again until the color changed.
- Add 250 ml water, add all the sauces and salt n pepper. Close the lid, let simmer for at least 15 minutes. Pour in the sesame oil, mix well, turn off the heat.

Soup
- saute the garlic until fragrant. 
- bring to the boil 500 ml of chicken stock, add the sauteed garlic, salt pepper and sliced scallion. Turn off heat 

How to Assemble
1. In a heat proof bowl, arrange the saute chicken mushroom,hard-boiled quail eggs and 2-3 eggs for a single serving. it taste heavenly after steaming. Cover the chicken with rice.
2. Steam for about 25-30 minutes
3. Remove from the heat, transfer to a plate, and serve with soup, sprinkle with onion and your favorite vegetable


Thursday, September 11, 2014

Pressure Cooker Chicken (Ayam Presto) and (Possibly) the Best Sambal Terasi I Have Ever Made


This dish is one of my family's favorite, I prepare it in bulk. Well, not that bulk actually. At least I use 2 chickens, so that I don't have to cook it again in such a short period of time. I usually keep some pieces of pressure cooker chicken in the refrigerator inside an airtight container, and the rest went to the freezer. Whenever I want to serve the chicken, all I need to do is thaw it, and fry. Saves time.

This spice-full chicken, is actually just a regular "ayam ungkep", so we called it in Indonesia. I cook it with pressure cooker simply because I want the meat part to be tender, easy to chew for my little ones. And right now, we are living really close to my father-in law, he is 80 years old, and cannot chew though food. For more, when you cook this chicken using pressure cooker, the spice really really infiltrated, absorbed into the deepest part. Yummmmy! Oh, btw, the chicken recipe was my mom's. She never use shallots to make this dish. And I agree with her, once I try to use shallots, it doen't taste as good. Since then, I only use garlic for boiling chickens.

I also include the recipe of how to make a super yummy sambal, the perfect pair of fried chicken! This sambal is quite similar to mashed sambal or sambal penyetan/sambal pecel lele, Central Java traditional food. Please note the secret ingredients, roasted sesame. Do not skip this, it makes the sambal has a deep nutty fragrance, and freaking delicious!

Ingredients :
- 2 chickens, cut into 6-8 pieces, according to your liking
- 1/2 tsp salt
- juice of 1 lime
- 1 lemongrass, mashed
- 2 cm galangal, remove the skin, mashed
- 2 bay leaves

Grind the following into spice paste
- 8 cloves of garlic
- 1 tsp of coriander seed, you can also use the ground coriander
- 4-5 cm of fresh turmeric
- 3 cm fresh ginger
- 6 candlenut
- 2 lemongrass (only the white part)
- 3-4 cm of galangal
- 1 and 1/4 tsp of salt, or adjust it according to your liking
- appx 150 ml water


psssst...this is the secret ingredients of the perfect sambal!


Chili Sauce with belacan paste
- 12 red cayenne chilies (Indonesian : cabe merah keriting)
- 6-8 bird eye chilies (Indonesian : cabe rawit merah). Be careful with this chili, it's freaking hot! *you can reverse the amount of chilies, if you are a fan of spicy hot sambal*
- 4 cloves of garlic, deep fried 
- 1 regular size tomato, remove the seed and deep fried for about 2-3 minutes
- 1 tsp of terasi/belacan, pan roasted 
- 1 tsp of sesame, pan roasted for about 1 minute
- 1 tsp of coconut sugar, or you can use just regular granulated sugar
- 1/2 tsp of salt, adjust this according to your liking. Some belacan taste more salty than the other, so add the salt in small amount first.
- 3-4 tablespoon of sizzling hot oil (use the oil that previously used for deep frying the chicken), adjust the amount of hot oil according to your taste, the more oil you use, it will get runnier.

How To :
1. Rub the pre-wash chicken with salt and lime juice, let sit for at least 5 minutes. This to remove the unpleasant smell of the chicken. 
2. Arrange the chicken in your pressure cooker, pour the spice paste, add the mashed lemongrass, bay leaves and galangal.
3. Let cook for 30 minutes, the counting starts after the pressure cooker whistling
4. After all the steam is gone, re-cook the chicken with open lid until the water evaporated.
5. Chickens are ready for deep fries.

Wednesday, September 10, 2014

Soto Ambengan


Another favorite menu, soto. This soto is famous not only in its origin, Surabaya, East Java. But also all over Indonesia. The difference of this soto compares to the other is, the use of koya (crushed shrimp crackers). It is really a good stuff I'm telling you. Do not skip the crushed crackers, if it is hard for you to find it in your grocery store, try to search at the nearest Asian Store in your city. They might have it.


Ingredients
- 1 free range chicken (Indonesian: ayam kampung), cut into 6
- 2  liter water
- 3  lemongrass (Indonesian: sereh), bruised and knotted
- 10 kaffir lime leaves (Indonesian: daun jeruk)
- 2 tablespoon oil
- Salt n pepper
- 1 tsp sugar

Grind the following into spice paste
- 12  shallots
- 6 cloves garlic
- 6 candlenuts, pan roasted
- 4 cm of fresh turmeric, pan roasted
- 2 cm ginger

Koya (shrimp crackers powder), grind the following together
- 4 large shrimp crackers 
- 4 cloves garlic, finely chopped, deep fry until crispy and golden brown
- 1/4 teaspoon salt
  
Garnish and accompaniments
100 gram glass noodle
100 gram cabbage
100 gram bean sprout (optional)
4 hard boiled eggs
2 scallions, thinly sliced
1 bunch Chinese celery, thinly sliced
lime wedges
boiled chili sauce

Instructions
Soto
1. Boil the chicken and water, simmer for at least 30-45 minute
2. Meanwhile, heat the oil in a frying pan, and sauté spice paste, lemongrass, kaffir lime leaves, until fragrant. Transfer the cooked spices into the chicken soup
3. Season the soup with salt, pepper and sugar
4. Turn off the heat, remove the chicken from the soup, tear the meat into small shreds with your hands. Set the chicken meat aside.

Garnish and accompaniments
1. Soak the glass noodle in cold water until soften, then blanch in boiling water until fully transparent.
2. Thinly slice the cabbage to make cabbage shreds, then blanch in boiling water.
3. Wash the bean sprout, then blanch in boiling water

To serve
1. Arrange boiled glass noodle, cabbage, chicken meat, and egg in a serving bowl. Top with some soup and some koya. Garnish with sliced scallion and Chinese celery. Serve with boiled chili sauce and lime wedges.


Monday, August 4, 2014

Soto Bandung


My mother comes from West Java, Bandung to be precise. So in our home, my mom used to make lotsa sundanese style food. They are amazing! You know, if javanese food is famous for the sweet taste, sundanese food is mostly savory and a bit spicy. And this clear soup is one of my family's favorite. No hassle. You don't even need to grind the ingredients. All you gotta do is smash the ginger, garlic etc with the side of your knife or smash it a little with pestle. Simple isn't it? Yet the taste is sooo good. Light and full of flavour.


Btw, Indonesia as an archipelago country, it has so many different cultures, tribes, and of course food. Including soto, it will easily recognize by the name mentioned after soto. For example, Soto Bandung. Of course its origin is from Bandung. Soto Betawi, comes from Betawi, Betawi/Batavia known as Jakarta now. Coto Makasar comes from Makasar, Soto Padang comes from Padang, West Sumatra, and so on.

Do give this Soto Bandung a try. This recipe is from my beloved mother. 


Ingredients :

500 gr shank beef, cut into 3x3 cm or according to your liking.
2,25 L water
8 cloves of garlic, mashed
3-4 cm of fresh ginger, mashed
4 cm galangal, mashed
2 lemongrass, mashed
3 bay leaves
2-3 tbsp of vegetable oil
2-3 tsp of salt
3/4 tsp ground pepper 
300 gr daikon, cut into about 0,5 cm circle


boiled chili sauce, boiled the following and the blend until smooth. 
-4 red cayenne chilies
-2 bird eye chilies
- juice from 1 lime
- salt 
- a pinch of sugar
- about 70-100ml of water


Garnish and accompaniments :

2 handfuls of soybean. Soaked into water about 30-45 minutes until it skin looks chipped. Drain with paper towel and deep fry until golden brown. Use low heat as they got dark easily, make sure the oil is hot.

1 bunch of scallion, thinly slice
1 bunch of chinese celery, thinly slice

sweet soy sauce (optional, I never use soy sauce for this soto, but some prefer adding a tsp or two of sweet soy sauce. Its your call)


HOW TO :
1. Bring to the boil the shank beef, and simmer for about 1 hour until the beef tender. Or else use pressure cooker to finish faster. 

2. Heat the oil in a frying pan, sautee the mashed garlic, ginger, galangal, lemongrass and bay leaves until fragrant. Transfer to beef soup.

3. Season the soup with salt and pepper.

4. Add the sliced daikon, bring to the boil and turn off the heat.

5. Serve with fried soybean, sliced celery, sliced scallion, sweet soy sauce and boiled chilies.

Sunday, July 13, 2014

Napa Cabbage Stir Fry


Very simple stir fry. One of my family's favorite dish :)

Ingredients :
1 napa cabbage (Indonesian : sawi putih), cut into 4-5 cm squares
4 cloves of garlic, thinly sliced
4 onions, thinly slice
2 chilies (optional), cut 
150-200 ml water
3 tbsp of cooking oil
1 tbsp of light salty soy sauce
1 1/2 tbsp of fish sauce
1 tsp of salt
pinch of sugar

1 handfull of fried mini anchovies for garnish.


How to:
1. Heat oil in a frying pan, sautee the garlic and onions for about 2 minutes, add the chilies. Wait until fragrant.
2. Add the napa cabbage, saute for a minute, add the salty soy sauce, fish sauce, salt and sugar.
3. Pour water, stir and bring to the boil. Turn off heat. Transfer to serving plate and garnish with fried mini anchovies

Saturday, July 12, 2014

Corn Fritter


Deep fry foods somehow is very much enjoyed in Indonesia. There are so many street vendor with their cart selling this yummy deep fried foods, in my country, we call it "gorengan". Despite the fact that it wasn't really healthy (its a deep fried thingy) , still....I'm addicted! To make me feel less guilty, I prefer to make my own gorengan at home. Much safer as I'm using good quality vegetables or ingredients. And of course, I use branded cooking oil. You know, some of the street vendors is a little naughty by using low quality cooking oil, or worst....some said they actually sees the vendors add clear plastic bag to the hot oil. It makes the gorengan more crispy, I heard. Sick!

So, this corn fritters is one of the most wanted gorengan. Including vegetable fritters, vegetable-stuffed tofu, fried banana, fried cassava and so on. When you make it yourself, you can use lots of corns! yum yum yum

I mashed half of the corn to get the juice, and the rest of the corn is perfect to get the texture.


Ingredients : 

- 2 large corns, peeled (or 3 small-medium size corn). Mashed half of the corn with mortar and pestle
- 2 bunch of spring onion, thinly sliced
- 1 carrot, diced (optional)
- 1 tsp salt
- pepper
- 200gr all purpose flour
- 2 tbsp white rice flour
- cold water
- optional : 1 egg (if you want the soft texture fritter, add 1 small egg..but if you prefer the crunchy fritter, omit the egg)

Grind the following :
- 2 cloves of garlic
- 2 red onion

How to :
1. mix the peeled corns and mashed corns, add diced carrot, sliced chives, garlic and onion paste. 
2. Add in the flour and pour cold water little by little, the batter should not be too thick or too runny. 
3. Prepare the wok and pour vegetable oil for deep fry. Make sure the oil is hot. Drop a spoonfull of the batter. Deep fry until golden brown, appx 2 minutes each sides with medium heat.
4. Remove from the heat, drain with paper towel


Sunday, July 6, 2014

Ikan Acar Kuning (Fish with yellow pickles sauce)


Very simple recipe. Commonly found in Indonesian's dining table. The taste is spicy, a little bit sour and of course delicious! You can use any kind of fish that you like with this sauce. 

Ingredients
4 pcs of fresh water fish appx @150gr-200gr (i'm using kembung layang fish)

for marinate :
1 tbsp of lemon juice
1/2 tsp salt
1 cm fresh ginger, mashed
30-50ml of water

Grind the following into paste :
6 shallots
4 garlic
3 cm fresh turmeric, pan friend without oil 
2 candlenut, pan fried without oil
1/4 tsp ground pepper
3 tbsp of cooking oil

1 stack of chives
1 tbsp of lemon juice
1 cm fresh ginger, mashed 
1 cucumber, cut into sticks
1 carrot, cut into sticks
some chili
250ml water 
salt
sugar


How to :
1. Marinate the fish for at least 15minutes
2. Deep fry with pre-heated oil, medium heat
3. Stir fry the paste with medium heat, until fragrant. Put in the carrot, cucumber sticks and chilies. Cook for about 2-3 minutes
4. Add in the water, sugar and salt. Bring to the boil.
5. Add the lemon juice and put in the fish and sliced chives. Mix thoroughly. 

Tuesday, February 18, 2014

Sup Ayam Tauge Tahu


Yang ini saya yakin para mommies pasti pernah buat. Menu simpel banget tp jadi andalan di rumah. Anak2 suka banget!!! Sampe anak pertama saya yang anti tauge bisa makan lho, termasuk taugenya juga. Hihihih, tp diselip2in tentunya :D 

Apa sih istimewanya sup ini? Kalo menurut saya, krn simpelnya dan isinya yg komplit. Udah ada protein hewani dari ayam, protein nabati dari tahu. Dan saya pake 3 warna sayur. Orens dari wortel, putih tauge dan hijau dari daun bawang dan seledri. Biasanya sih, sup ini tidak menggunakan wortel, tp krn saya pengennya lbh berwarna dan sehat, dikasih wortel malah lbh enak lho.

Yang perlu diperhatikan dalam memasak sup ini adalah saat membuat kaldu. Biasanya saya menaruh setangkai seledri saat membuat kaldu, dan menggunakan api keciiiil sampe sktr 45mnt-1jam. Hasilnya nanti kaldunya wangi tenan!

Demikian resepnya ya :)


Untuk kaldu :
6 potong ayam (saya pakai paha atas dan bawah), lumuri dengan air heruk nipis lalu dicuci bersih
1 tangkai seledri
1,5 L air

Bumbu halus :
5 buah bawang merah
5 siung bawang putih
garam dan lada (sesuai selera)
2 sendok makan minyak goreng

Isi : 
4 buah wortel (saya pake wortel lokal), potong2
1 buah tahu putih, potong dadu sktr 2x2cm, goreng hingga berkulit
segenggam tauge (atau sesuai selera)
3 helai daun bawang, iris2
1 tangkai seledri, iris halus

Untuk taburan :
3 siung bawang putih, iris halus dan goreng hingga kecoklatan. sisihkan 

Cara :
1. Rebus ayam yang sudah dibersihkan, dengan api sedang. Setelah mendidih, masukkan seledri (tidak perlu diiris). Kecilkan api, masak hingga kaldu menjadi wangi, kurang lebih 45 mnt-1jam. Buang lemak2 yg mengambang di permukaan dengan menggunakan sendok sayur atau saringan halus. Besarkan kembali api.
2. Tumis hingga wangi bumbu halus, masukkan ke dalam kaldu
3. masukkan tahu yang sudah digoreng dan wortel, lalu setelah agak empuk masukan tauge.
Matikan api, masukkan irisan daun bawang+seledri dan bawang putih goreng


Wednesday, October 30, 2013

Egg Balado / Hard Boiled Egg with Chili Sauce


I looooove Indonesian food, its always delicious and tasty, and mostly..spicy :D I believe most of Indonesian loves spices. Chili is almost in every dishes we have. Even its just a simple stir fry vegetable, we add 1 chili and make the food taste even better. We have many varieties of chilies here, but there are few most popular chilies which is commonly used in many recipes. In this egg balado recipe, I'm using 2 kind of chilies as shown on picture, cabe merah keriting which is smaller in size and cabe merah besar which is bigger but has less spicy taste. 


I combine this two so that I don't have to shed all the sweat while eating :D Its only slightly spicy on my tongue, not to hot. To reduce the heat of the chilies, you can remove all the seeds or add 1 tomato (remove the skin and seed) to add a bit of sweet-sour taste. So here's the simple ingredients to make your own sambal balado. You  can actually use fried eggplant, friend potato or tofu, whatever you desired. If peeling hard boiled eggs wasn't something you interested in, you can use sunny side up instead ! 


6 hard boiled eggs, peeled, cut a little bit (as shown on picture)
8 tbsp cooking oil


Grind the following into spice paste
12 big red chilies 
10 red chilies
10 shallots ( I use about 18 shallots, as what i have on my kitchen is small in size)
6 garlic
2 tsp salt
1/2 tsp sugar

about 2,5cm galangal, mashed
3 bay leaves

how to 
1. Heat cooking oil in a frying pan with medium heat, fry the egg until the skin blisters

2. Fry the spice paste, add in the mashed galangal and bay leaves. Cook until fragrant about 5 minutes 


3. Put the eggs into the frying pan until all the liquid reduced (mine takes about 15 minutes)


Thursday, October 10, 2013

Opor Ayam Spesial


Untuk resep ini, saya yakin hampir semua sudah punya resep favorit masing2. Tapi yang ini adalah resep favorit di keluarga kecil kami. Setelah melalui berkali2 uji coba, menurut saya yang ini sudah pas banget rasanya. Cocok banget dengan lidah kami, sampai anak2 yang sampai saat ini masih anti dengan hidangan bersantan, mau makan dengan opor ini! Gak sia2 kan trial and errornya #emak nyengir lebar.

Yang pasti, ayamnya empuk dan lembut, kuahnya yumeeeeh abissssssssss. Wanginya jg bikin pingsan deh, apalagi proses bumbunya 2x, pertama disangrai dulu (proses ini aja sdh bikin bumbu2 jadi berbau khas), lalu ditumis. Aduhayyyy bgt deh pokoknya. Nah supaya mengurangi rasa eneg akibat makan opor terus menerus, saya tambahin 1 buah belimbing wuluh, mantap bgt. Gak usah khawatir, gak bikin kuah jadi asem kok, malah jadi enaaaak tenan. Oya kalo tidak ada belimbing wuluh bisa diganti dengan lime kok. 

Trus apa lagi sih istimewanya? Kebanyakan resep opor yang saya tau, ngga menggunakan terasi dan gula merah. Tp aseli, ini berpengaruh banget ke rasa lho (menurut saya :D )

Demikian resepnya ya :

12 potong ayam  (about 1,3 kg)
3-4 lembar daun jeruk
1 belimbing wuluh, potong2
2 sdt gula merah
2-2,5cm lengkuas, digeprek
500 ml santan kental
300-400 ml santan cair/air
2 lembar daun salam
3-4 sdm minyak goreng
garam
4 butir telur rebus (optional)

Sebagian di sangrai, lalu diblender : 
10 butir kemiri
10 butir bawang merah
5 bawang putih
2 buah cabe merah (optional)
2,5 cm jahe
1,5 sdt ketumbar (bisa juga pake yang bubuk)
1 tsp of jintan (bisa juga pake yg bubuk)
1/2 tsp lada
1 sdt terasi


Cara membuat :
1. Sangrai bawang merah, putih, cabe, kemiri, jahe dan terasi sampai wangi dan berubah warna sedikit. Blender dengan ditambah kemiri, jintan, lada.
2. Tuang minyak goreng, masukan blenderan bumbu ditambah lengkuas geprek, daun jeruk dan daun salam. Tumis hingga wangi. 
3. Masukkan potongan ayam, masak sampai berubah warna (ayam sudah tidak pink lagi). Tambahkan garam dan belimbing wuluh.
4. Masukkan santan, aduk2 terus menerus sampai mendidih. Kecilkan api, dimasak hingga ayam menjadi empuk dan air sudah berkurang sekitar 40-50 menit. Bila menggunakan telur rebus, masukkan. 
5. Hidangkan dengan bawang merah goreng.


ENGLISH VERSION 


OPOR AYAM / Chicken cooked with coconut milk

What so special about this opor ayam? I believe most of us must have our own favorite recipe of opor ayam. But the one that I made was from trial and error for so many times until I come out with this recipe. Some of the ingredients were roasted first, and then stir fry. I believe that's what makes it taste so good. 

This dish commonly serve during Lebaran celebration in many provinces in Indonesia, or any special occasions. Usually paired with beef rendang and sayur labu siam, the trio combination can caused craving for more and more and more.

So readers, here is the recipe : 

12 pcs of chicken (about 1,3 kgs)
3-4 kaffir lime leaves
1 belimbing wuluh, sliced
2-2,3cm galangal, smashed
2 tsp of palm sugar
500 ml coconut milk
300-400 ml thin coconut milk/water
2 bay leaves
3-4 tbsp of cooking oil
salt
4 eggs, hard boiled (optional)

Pan roasted and grind the following into spice paste :
10 candlenut
10 shallots
5 garlic
2 chilli (optional)
2,5 cm ginger
1,5 tsp corriander seed (you can use corriander powder as well)
1 tsp of cumin seed (you can use cumin powder as well)
1/2 tsp pepper
1 sdt shrimp paste


how to :
1. Pan roast/stir fry without oil, shallot, garlic, chilli, ginger, candlenut, shrimp paste until a little bit brown and fragrant. Process in a blender, add in the corriander seed, cumin seed, pepper until smooth
2. Heat the cooking oil, pour in the spice paste, add in the mashed galangal, kaffir lime leaves and bay leaves. Continue stirring until fragrant, about 2 minutes.
3. Add the chicken pieces and cook until it change color (no longer pink), add salt and sliced belimbing wuluh (you can use half of lime as a substitute of belimbing wuluh)
4. Pour in the coconut milk and the thin coconut milk/water, stirring continuously is required on this stage. After boiling, reduce the heat, cook until the liquid reducing and the chicken is tender about 40-50 minutes.
5. Serve with fried shallots


Wednesday, October 9, 2013

Semur Daging Betawi


Lebaran yang lalu, seorang teman dalam dunia perdapuran saya mem-posting resep semur betawi. Glek! Langsung penasaran sama rasanya, karena semur betawi memang berbeda sekali rasanya dibanding semur2 lain yg cenderung encer. Saya betul2 berharap banyak dari resep ini, percaya deh pokoknya sama Jeng Pity, karena kedua ortu nya kebetulan memang orang betawi :D 

Jadi langsung nyontek ke dapur Jeng Pity deh, tp pertama kali saya buat menggunakan ayam, begitu jg dengan yang kedua dan ketiga, hihihiihihihihi. Nah yang difoto ini kebetulan pas bikin yang pake daging sengkel.

Hati2 ya temaaaans, dijamin ketagihan! apa sih rahasia semur ini? Menurut saya, ada di penggunaan kelapa parut yang disangrai hingga wangi dan ditumbuk sampai berminyak! That's it. Semurnya kental dan very fragrant, kecium kemana2 sampe yang masak nyaris pingsan :D 


Saya membuat adjustment sedikit di bumbu2 nya, waktu pertama buat ngikutin plek punya Ipit dengan  bawang merah putih yang sebagian diiris, sebagian dihaluskan. Berikutnya dan seterusnya, semua bahan saya campur aja dan diblender. It taste the same, aseli gak ada perubahan :D Jadi saya pake yang praktis aja. Makasih ya Piiiit, untuk men-share resep turun temurun keluarga lo ini. Semoga berkah buat keluarga lo yaaa, resep ini sudah menyenangkan banyak orang dan juga mengeyangkan banyak perut :P


Demikian resepnya ya  :


SEMUR BETAWI

1 kg daging sengkel
2-3 sdm kelapa parut, sangrai hingga wangi dan kecoklatan
250ml kecap manis
3 cups of water / 750 ml air
2 sdm minyak goreng
3 buah kentang, potong empat lalu goreng setengah matang

haluskan dengan blender : 
10 bawang merah
4 butir bawang putih
5 butir kemiri
2 cm jahe

2 batang sereh, geprek
1cm lengkuas, geprek
3 helai daun salam
1/2 buah pala, parut
garam
merica

How to :
1. Lumuri daging dengan bumbu halus, tambahkan 50ml kecap manis dan 2 sdm minyak goreng, dimasak sampai daging mengeluarkan air. Masukkan sereh, lengkuas, daun salam dan pala parut.
2. Sangrai kelapa parut hingga wangi dan berubah warna, lalu tumbuk sampai mengeluarkan minyak. 
3. Tambahkan 3 cup air, 200 ml kecap manis (atau sesuai selera, diicip dulu aja kurang apa). Masukkan garam, merica dan kelapa yg sudah ditumbuk. Biarkan hingga daging empuk, kurleb 1 jam (masak dengan panci ditutup ya)


ENGLISH VERSION


Last Lebaran, a friend of mine posted this super interesting recipe of Betawinese beef stew. Exactly what I'm looking for, for soooo long. Ipit, my friend, is a betawinese from both her mother and father. So, I put on my trust on her stew :D 


Betawinese beef stew is a popular food in Indonesia, the meat is tender, due to its long process, melt-in-your-mouth kind a thing, and full of spice. Beware, it can cause addiction! Despite its not-so-good appearance caused by the black color, trust me, my friend. You have got to try this!

You can click this link for the original recipe, I only make a small changes to the ingredients based on my liking.

Here is the recipe for by far, the most delicious Betawinese beef stew I've ever made.

You can simply change the beef with chicken and also add some veggies like carrots or green beans and make it even more healthy.


BETAWINESE BEEF STEW

1 kg of shank beef 
2-3 tbsp of grated coconut
250ml sweet soy sauce
3 cups of water
2 tbsp of cooking oil 
3 potatoes, cut into 4 and deep fry until half done

grind the following into spice paste
10 shallots
4 cloves of garlic
5 candlenuts
2 cm of ginger

2 lemongrass, mashed the white part
1cm of galangal, mashed
3 bay leaves
1/2 nutmeg, grated
salt
pepper

How to :
1. Cover all the shank beef with the spice paste, add 50 ml of sweet soy sauce and 2 tbsp of cooking oil, turn on the heat and cook until it watery.  Add in the galangal, nutmeg, bay leaves and lemon grass.
2. in the meantime, stir fry the grated coconut on a pan with medium heat without oil (pan roasted). Stir continuously until it fragrant and the color is golden brown a little bit. Mashed the coconut until you can see a little liquid comes out from the coconut (looks oily)
3. Add in 3 cups of water and the rest of the sweet soy sauce, you can add in more sweet soy sauce based on your liking, have a taste first. Add in salt and pepper to taste. Lastly, add in the mashed coconut. Cook with the lid on and leave it for at least 1 hour, until the meat is tender.