Showing posts with label Chocolate. Show all posts

Friday, March 13, 2015

Chocolate Almond Cake

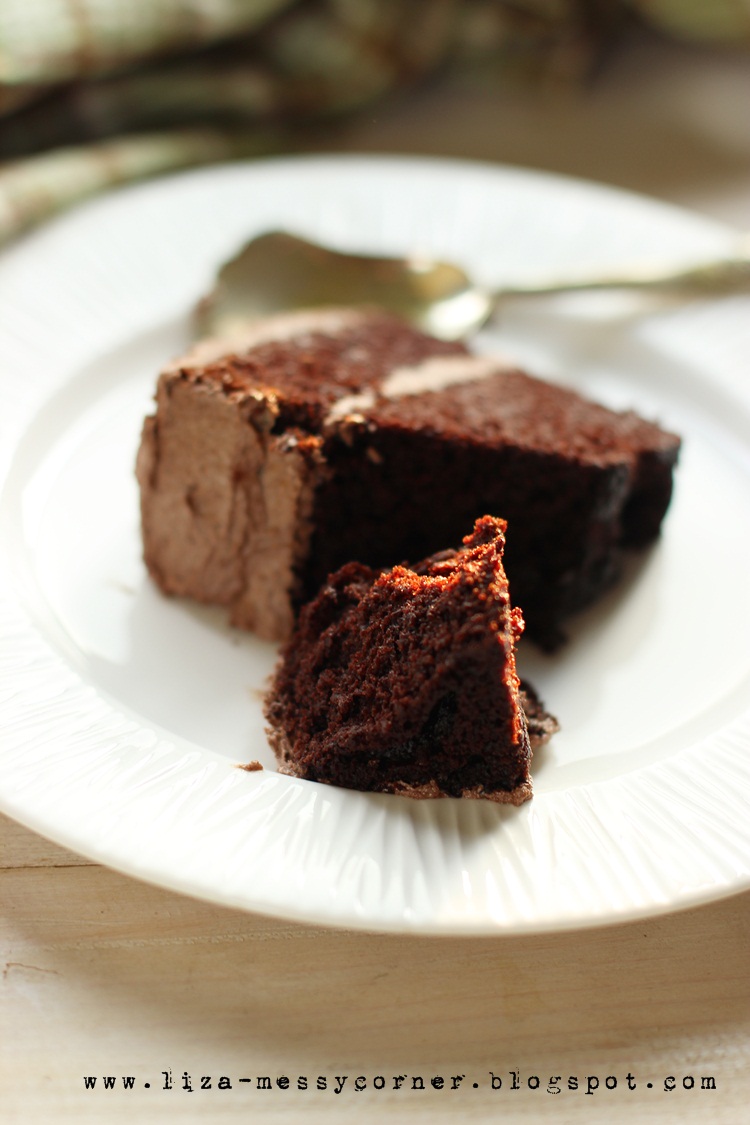
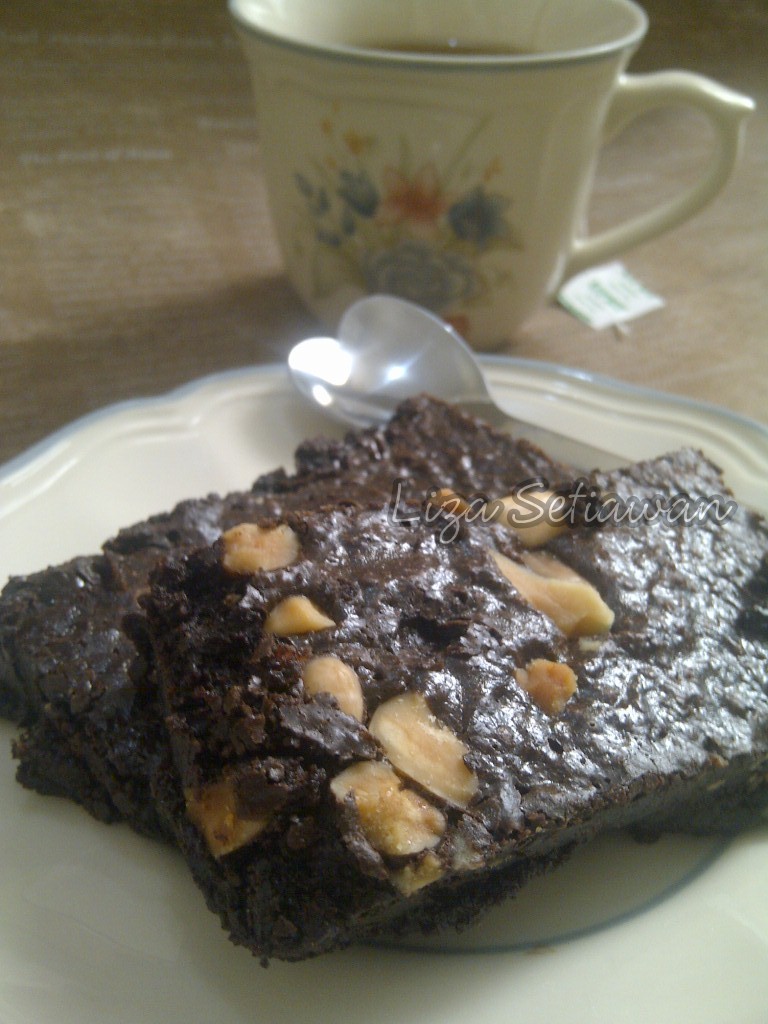
Julia Child's recipe. Pardon me for the short and to the point post. I am so in a hectic situation lately. Will update this post once I got the chance to do it. Highly recommended! It is soft, moist, dense, chocolate-y and oh my gosh addictive!


Chocolate Almond Cake

Ingredients :

For the cake:
113 grams dark cooking chocolate, chopped
2 tablespoons coffee
1/2 cup (113 grams) unsalted butter, at room temperature
2/3 cup (132 grams) + 1 tablespoon sugar, divided
3 large eggs, separated
Pinch of salt
1/3 cup (35 grams) almond flour/meal
1/4 teaspoon almond extract
1/2 cup (57 grams) cake flour, sifted

For the icing:
113 grams dark cooking chocolate, chopped
4 tablespoons coffee
3/4 cup (170 grams) unsalted butter, at room temperature
Slivered almonds, for garnish
Instructions

To make the cake:
1. Preheat oven to 180 degree celsius. Butter and flour an 20cm round cake pan and line with parchment paper.
2. Combine the chopped chocolate and coffee or run in a small bowl placed over a saucepan of simmering water. Stir as the chocolate melts and remove from heat as soon as it's smooth. Set aside to cool.
3. In the bowl of a stand mixer fitted with a paddle attachment, beat the butter and 2/3 cup sugar until pale and creamy. Add the 3 egg yolks and beat until thick. Add the cooled melted chocolate. Stir in the almond extract and almond meal/flour and mix until just combined.
4. In a separate bowl and with a whisk attachment, whip the 3 egg whites and salt on high speed until foamy. Slowly add the tablespoon of sugar and whip to stiff peaks.
5. Add 1/4 of the whipped egg whites to the batter and fold gently until combined. Add and fold in the remaining whites in 3 additions, alternating with the sifted cake flour. Fold only until the streaks of egg whites disappear, do not overmix.
6. Pour the batter into the prepared cake pan. Bake until the edges are set but the center still jiggles when the pan is bumped, about 25 minutes.
Let cool 10 minutes, then run a knife around the edges to remove cake from pan and place on a wire rack to cool completely.

For Icing :
1. Combine the chopped chocolate and coffee or run in a small bowl placed over a saucepan of simmering water. Stir as the chocolate melts and remove from heat as soon as it's smooth.
Add the butter a tablespoon at a time and use a whisk to beat it into the chocolate. Whisk until smooth.
Let the icing cool to a spreadable consistency, stirring it every 5 minutes or so. It should take about 15-20 minutes, depending on the temperature of your kitchen.
Spoon the icing on top of the cooled cake and spread it to cover. Garnish with slivered almonds.

Monday, November 3, 2014

Hot Cocoa Milk with Cinnamon


This recipe was requested by my eldest son, who loves anything with chocolate. I often saw him stumbled upon my recipe books, reading each page and picking which one he wants me to try to make for us. That time, he asks me whether we have milk, cocoa powder and sugar. I said we have it, so the next couple of days I'm making his request.

Nothing special with this recipe actually, it is just milk and cocoa powder. The only wow factor is, cinnamon. I add a cinnamon stick just to enhance the flavour. Oh and of course,hot cocoa is never complete without......marshmallow! This is his first time ever, drinking hot chocolate milk with hint of cinnamon and ooey-gooey-melty marshmallow. He was more than happy and ask for more! It is soooo easy to make a little boy happy, isn't it? 

The recipe was inspired by Paula Deen "My First Cookbook", with adjustment based on my liking.


Ingredients :
700ml plain milk
4-5 tbsp cocoa powder (use good quality of cocoa powder)
4-5 tbsp of sugar
1 cinnamon stick
Marshmallow

How to :
1. Put the sugar and cocoa into the pot and whisk together. Pour in the milk, cinnamon stick and whisk again. Put the pot on the cooktop and turn the heat to very low. Heat until it is hot bot not boiling, about 10 minutes. Stir occasionally with the whisk, making sure that you mix in all of the cocoa.
2. Ladle into mugs and top each one with a handful of mini marshmallows and dust it with cocoa powder.

Monday, July 14, 2014

Triple chocolate layer cake


I feel so sorry that I haven't upload this cake from last month. This was my little boy 3 rd birthday cake....

You see, this is my very first time baking birthday cake! Never in my entire life have I done this before. All this time, when it comes to birthday cake, we always buy from our favorite store :D  The thing is, I dont have the tools to make pretty looking cake, nor the baking pans! I have a 20cm round pan and a 20cm square pan. Sigh....however, I decide to continue my plan to make the cake. There is always a first time for everything. I don't know what to do with the different shape's pan, but heck...lets just do it! When the cake is ready, I then cut all the square edges of my chocolate cake to be stack with the round cake. Ohhh my gosh it was disastrous. Haha! So I did everything I can to cover the mess. For more, they are not even on the same height. The round cake is thicker than the square. 

As for the taste, it rocks! So very moist, and rich and chocolatey. Just the way I  like it. And the birthday boy? he looooooves it! Yeayyyyyy. I'm planning to share the cake with my nephew and nieces who regularly visit our home on the weekend, that is why I make the cake on Friday, a day after my boy's bday. Hoping that it will still be enough cake to share on saturday. Too bad they don't get a chance to taste it :D All the cakes are gone before they came :D My two boys looove it so much they even lick the homemade buttercream. Which they never did before! Of course I'm super happy, despite the cake appearance look a bit horrible, they are fantastic!

The cake use oil, and I think its perfect. You don't need butter smells to make this cake more delicious. And for more, oil always make cake more moist than butter!


ChoCOLATE LAYER CAKE
Cake adapted from Ina garten, via Sally's baking addiction

 1 and 3/4 cups (220 grams) all-purpose flour
1 and 3/4 cup (350 grams) granulated sugar (I use 300 grams of sugar)
3/4 cup (95 grams) unsweetened cocoa powder (not dutch processed)
1 teaspoon baking powder
2 teaspoons baking soda
1 teaspoon salt
1 cup (240 ml) buttermilk
1/2 cup (120 ml) vegetable oil 
2 large eggs, at room temperature
1 teaspoon vanilla extract
1 cup (240 ml) freshly brewed strong hot coffee

CHOCOLATE FROSTING
1.25 cups (2.5 sticks or 290 grams) unsalted butter, softened to room temperature (I use 1 cup)
3-4 cups (360-480 grams) powdered sugar (I only have 1 and 3/4 cup powder sugar)
3/4 cup (95 grams) unsweetened cocoa powder (I use 1/2 cup chocolate powder)
3-5 Tablespoons (45-75 ml) heavy cream 
1 teaspoon vanilla extract
1/2 - 3/4 teaspoon salt (to taste)


Directions:
1.       Preheat oven to 180C degrees. Butter & flour two 20cm round cake pans, or use non-stick spray.
2.      For the cake: Sift together the flour, sugar, cocoa powder, baking powder, baking soda, and salt in a medium sized bowl. Set aside.
3.      Using a handheld or stand mixer on high speed, mix the buttermilk, oil, room temperature eggs, and vanilla in a large bowl until combined. Slowly add the dry ingredients to the wet ingredients with the mixer on low. Add the coffee. The batter will be VERY thin. This is ok.
4.      Pour the batter into prepared baking pans and bake for 23-27 minutes or until a toothpick inserted in the center comes out clean. 
5.      For the frosting: Cream the butter with a hand mixer on medium speed for 3-4 minutes. This will create a nice creamy base for the frosting. Add 1 and 1/2 cups of powdered sugar and 1/2 cup of cocoa powder. Mix on low. Add 4 Tablespoons of heavy cream and 1 teaspoon of vanilla extract. If your frosting is too thin, add up to 1 more cup of powdered sugar. If your frosting is too thick, add up to 2 more Tablespoons of heavy cream. Add at least 1/2 teaspoon of salt. Taste the frosting and add more salt if the frosting is too sweet. Add more cocoa powder if the frosting is not chocolate-y enough. _Frosting recipe is forgiving. Add more/less of each ingredient to obtain the consistency and taste you desire._
6.      Place 1 layer, flat side up, on a plate. With a knife or offset spatula, spread the top with frosting. Place the second layer on top, rounded side up, and spread the frosting evenly on the top and sides of the cake. Decorate with anything you desired.
7.      Cake stays fresh, moist, and soft at room temperature (covered) for up to 4 days. Cake may be refrigerated (covered) for up to 7 days.


 Sorry for the horrible pictures, I promise to post better photos if I bake this cake again :)

Monday, February 10, 2014

Double Chocolate Muffin (to die for)


I've been trying so many chocomuffin recipes. Creaming the butter method, reguler with melted butter method, custard method and so on. But this one is the best! Choco muffin from heaven, to die for. This is exactly what I'm looking for the whole time. Not too sweet, very chocolatey due to the use of quite alot of choco powder. Yep, the batter doesn't required melted dark cooking chocolate! Which I think it makes the muffin taste so damn good. 


I adores chocolate powder on muffins and pudding :D Not that I don't enjoy melted dark cooking chocolate, they are too one of my favorite indulgent. But on muffins, powder taste stronger and more chocolatey than dcc :D The recipe also calls for dcc, chopped and toss to the batter. Yummmmmm can you imagine while the muffin still hot, all the dcc are melted? *drooling* and for more, some of the chopped dcc is use as a topping. Holy chocolate!


 The Recipe :

300 g all purpose flour
80 g cocoa powder
1 tbsp baking powder
1/2 tsp baking soda
1/4 tsp salt
250 g granulated sugar
100 g butter, melted
250 ml buttermilk 
2 large eggs
150 g dark chocolate (70%), coarsely chopped

Heat oven to 180 degree celcius. Prepare a cupcake pan with 12 muffin liners. Mix flour, cocoa powder, baking powder, baking soda and salt in bowl. Set aside. Mix sugar, butter, buttermilk and eggs in a large bowl. Add dry ingredients to wet ingredients and mix until just combined. Stir in chocolate, but save 1/4 of the chocolate to put on top of muffins. Divide batter between 12 liners, filling them completely full. Sprinkle with remaining chocolate pieces. Bake for 25-30 minutes or until a tooth picks inserted comes out almost clean. 


recipe taken and adapted from call me cupcake. 

Wednesday, February 5, 2014

Brownie cheesecake


I know I know. Such a late and boring recipe. I believe almost every foodblogger once, twice, thrice baked this famous brownie. I gotta say I choose David Lebovitz recipe because it use less egg :D How I love that! and like any other David's brownie recipe, it doesn't required baking powder. Means healthier at all cause. As for the taste, they're scrumptious! I enjoy it the most when cold. Need any more explanation? brownie....chocolate and creamcheese? Perfect combo. Though my marble was quite disastrous, haha. Blame it on the little pair of hands who wants to help mommy on the swirling :D Anyway, he's so happy that I let him do the swirl. So, tho its look pretty awful, I admire my little boy's spirit. He always take part almost everytime I bake something :)


The Recipe, taken from David Lebovitz Cheesecake Brownie


6 tablespoons (85g) unsalted butter, cut into pieces
4 ounces (115g) bittersweet or semisweet chocolate, chopped
2/3 cup (130g) sugar
2 large eggs, at room temperature
1/2 cup (70g) flour
1 tablespoon unsweetened cocoa powder
1/8 teaspoon salt
1 teaspoon vanilla extract
1/2 cup (80g) chocolate chips
8 ounces (200g) cream cheese, at room temperature
1 large egg yolk
5 tablespoons (75g) sugar
1/8 teaspoon vanilla extract

HOW TO : 

1. Line a 9-inch (23cm) or 8-inch (20cm) square pan with butter

2. Preheat oven to 350 degrees (180C).

3. In a medium saucepan, melt the butter and chocolate over low heat, stirring until smooth. Remove from heat and beat in the 2/3 cup (130g) sugar, then the eggs.

4. Mix in the flour, cocoa powder and salt, then the vanilla and chocolate chips. Spread evenly in the prepared pan.

5. In a separate bowl, beat together the cream cheese, the yolk, 5 tablespoons (75g) of sugar, and vanilla until smooth.

6. Distribute the cream cheese mixture in eight dollops across the top of the brownie mixture, then take a dull knife or spatula and swirl the cream cheese mixture with the chocolate batter.

7. Bake for 35 to 40 minutes, or until the batter in the center of the pan feels just set.

Let cool, transfer to cooling rack


Sunday, September 15, 2013

Brownies kukus ketan item/ black glutinous rice flour brownies


Who doesn't like.brownies? I certainly not on the list! 
Before I jump into blogging world, I've tried many varieties of brownies. Well, to be honest, most of them was not my homemade. It is easier to have the store-bought brownies at that time. But now that I finally find my passion for cooking, baking and food photography, I try to make the brownies myself :) 

Last time I made a banana brownies, which is so moist and decadent. This time, I'm making a glutinous black rice flour brownies. Its gluten free of course! And if you want to make it even healthier, skip the emulsifier. As long as you mix it properly the batter will get thicker even though it may need more time. 


This amazing recipe was taken from bunda Ricke's blog. You must try this, I've made this brownies twice in 10 days. My boys looove it. Eventhough the first few bites they gave me a weary look, but then they said that it was yuuuuuum and they keep coming back for more. A happy mommy, I am :)
This brownies have a different textures from other brownies due to the use of black glutinous rice flour. It slightly feel sandy in your mouth, but don't worry, its in a good way :)

Here's the recipe, you can click the link above for recipe in Indonesian :)

6 eggs
200gr sugar
1tsp emulsifier
1tsp vanilla
1/4 tsp salt 

2tbsp sweet condensed milk

250gr black glutinous rice flour
20gr chocolate powder 
=> mix it well with whisker

100gr of dark cooking chocolate, chopped and melted (I use microwave to melt the chocolate)
200gr of cooking oil/canola oil

Rice chocolate for layer

How to : 
1. Preheat your steamer 
2. Melt the chocolate (mine takes 3minutes on microwave), and then pour in the oil, mix well with whisker. Let it cool.
3. Mix the egg, sugar, emulsifier and salt with mixer on high speed until the batter looks pale white, thick and rising (mine took about 20minutes)
4. Add in the vanilla, mix well. Then add in the sweet condensed milk
5. Pour in the flour mixture, mix until well combined
6. Add in the melted chocolate+oil, then mix it with spatula until the batter looks homogen 
7. Grease 20*20*7 baking pan with melted butter and baking paper. Place half of the batter, steam for 10minutes. After that spread the rice chocolate (if using) and pour the remain batter and steam for another 20-25minutes.

Don't forget to cover the steamer lid with napkin or kitchen towel so that the water doesn't fall to the batter :)

As a prove that i did made this steam cake twice in 10 days, here another photo of the cake. I cut the cake while it still warm and look at the texture.......


Tuesday, August 20, 2013

Banana Brownies


kalo ada pisang nganggur mulai berbintik hitam, biasanya orang2 malah dibuang. Kalo saya, saya tunggu2 tuuuuh, yang kulitnya udah gak mulus berbintik gitu malah uwenak dijadiin apa aja. Bisa dicampur ke adonan muffin, cake, banana bread dll. Tapi kali ini saya mau bikin banana brownies :D 

berhubung lagi malas sangat dan didera ngantuk, lets cut the crap n jump to the recipe.
Pokoknya brownies ini enak, nyoklat banget dan tetep terasa dan kecium aroma pisangnya :D yummmmmeeeeeh


Banana Brownies
  
bahan:
150gr dark cooking chocolate
125gr gula pasir (saya hanya pakai sktr 110gr)
1/2 sdt vanilla bubuk atau pasta (saya gak pake)
3 sdm mentega
300gr pisang ambon/cavendish/raja (saya pake 3 buah pisang ambon lumut, dilumat halus)
2 butir telur ayam ukuran besar, kocok lepas
100 gr tepung terigu protein sedang/all purpose
1/2 sdt baking powder
20gr coklat bubuk
1/2 sdt garam

cara pembuatan:
1. Panaskan oven di suhu 175 dercel, siapkan loyang kotak ukuran 20x20, olesi mentega dan alasi bagian dasar dengan kertas roti
2. Dalam wadah, campur tepung, baking powder, coklat bubuk, dan garam. Aduk rata, sisihkan.
3. Tim dcc dengan tehnik double boiler hingga meleleh. Angkat dari api.
4. Aduk dcc dengan balloon whisker hingga licin, tambahkan gula,mentega dan vanilla. Aduk rata. Jika terlalu kental, panaskan sebentar adonan dengan ditaroh diatas panci berisi air mendidih.
5. Masukkan puree pisang, aduk2 dan masukan telur yang sudah dikocok lepas, pastikan suhu coklat tidak panas banget saat telur masuk ya. Aduk hingga halus
6. Masukan tepung ke dalam adonan dengan tiga tahapan, aduk dgn spatula. Tuang adonan ke loyang, ratakan permukaannya
7. Panggang selama 35-40 mnt atau hingga brownies matang dan tidak lengket saat ditusuk dengan lidi.


Thursday, March 7, 2013

Gluten free brownie for my love


Kemarin, hubby ultah, saya yg lg kena baking blues plus pegel2 sebadan gak ilang2, bingung mau bikin apa. Cake? untuk saat ini oven tangkring tercinta kayaknya bukan solusi untuk bikin cake. Entah salah ovennya atau apinya, yg pasti kalo bikin sesuatu,harus sambil diputer2 sesekali supaya matangnya rata *lap kringet*

dan juga, kebetulan hubby kurang suka cake. Plg yg dia makan ya bronis aja, selebihnya prefer yg asin gurih, or macem apple pie gtu. 

Dengan waktu terbatas, bronis mmg dah pasti jadi andalan :D Kebetulan jg dari kapan,pengen bgt eksekusi bronis-nya David Lebovitz yg gluten free *another less guilty treat*. Biasanya hubby suka ogah sama yg gluten free2-an,krn katanya biasanya gak enak, wkwkwkwkw.

Ah tp saya nekad bikin jugak, wong penasaran :D

Resepnya aseli simpeeeel banget, dan gak perlu mixer, saya cuma pake balloon whisker ajah.

Berikut resepnya ya,yg sudah saya translate :

Ingredients :
85 gr butter
225 gr dark cooking chocolate, dicacah
3/4 cup sugar (saya pakai 120gr, dan rasanya buat sya masih terlalu manis, next time saya akan buat dengan 100gr aja)
2 butir telur ukuran besar
1 sdm coklat bubuk
3 sdm tepung jagung (maizena)
sedikit garam
kacang2an (saya pakai kacang almond yg dipanggang terlebih dahulu lalu dicincang kasar)

How to:
1. Nyalakan oven. Lapisi loyang brownies atau loyang kotak 20x20cm (aslinya David Lebovitz pake loyang 23cm, tp saya liat kayaknya bakal jadi tipis kayak kukis kalo pake 23x23) dengan baking paper, silpat atau alumunium foil (don't skip this stage! kalo di skip nanti susah angkat browniesnya, krn ini tipe brownies yg sangat moist dan dense).

2. Lelehkan butter dengan wadah diatas panci berisi air mendidih, masukan dcc cincang. Aduk sampai rata, masukan garam.Aduk rata. 

3. Angkat wadah dari atas panci, masukan gula, aduk. Lalu masukan telursatu persatu.

4. Adonan tepung diaduk rata di tempat terpisah, lalu dituang ke adonan coklat. Aduk dengan sekuat tenaga sampai kurang lbh 1mnt, sampai adonan keliatan halus.

5. Apabila menggunakan kacang, aduk dalam adonan dengan spatula.

6. Tuang adonan ke loyang. Panggang sktr 30mnt (saya 45mnt, krn pas 30mnt,adonan masih basah bgt)

7. Tunggu sampai brownies benar2 dingin untuk dipotong

My opinion for this recipe : Uwenak banjeeeeeets, aseli, dengan bahan yg simple dan sedikit,hasil sangat maksimal :D Brownies ini hanya pake 3sdm tepung, tp enaaa 
Pas hubby coba, saya gak kasih tau kalo ini adalah resep gluten-free :D dan dia gak nyadar, malah bilang ini enaaaaak bgt...Gak sia2 juga nekad bikin di waktu yg super mefet :P. And for more, the boys love it too, they keep munching n chewing and ask for more brownies.