Tuesday, February 24, 2015

Creamy Chicken and Mushroom Fettuccine


This creamy sauce is the heart of the dish, I am not sure if there were a name for the sauce....as I am actually made this on my own intuition, not based on other people's recipes. It is creamy, but not super creamy as I mix the cream with milk, and also adding some chicken stock to enhance the flavour. Because I am not an Italian, so I add this and that so that this sauce is tastier and suitable for my very demanding (for spice) Indonesian tongue.


Ingredients :

300 gr fettuccine
200 gr chicken fillet, cut into cubes
150 gr fresh mushroom, or canned champignon mushroom

3 cloves of garlic, finely chopped
1 onion, finely chopped
1 tsp all-purpose flour
1 tsp butter
2 tbsp extra light olive oil
salt and crushed black pepper, to taste, depending on your liking
2-3 tbsp grated parmesan
a bunch of parsley, finely chopped
250 ml cooking cream/heavy cream
250 ml uht milk
100 ml chicken stock

Instructions :

1. Bring a large pot of slightly salty water to a boil. Add the fettuccine and a tbsp of cooking oil. Cook about 8-10 minutes until aldente.
2. Saute the garlic and onion with butter and olive oil until fragrant, add the all-purpose flour, mix until no more lumps. 
3. Add in the chicken cubes, saute until cooked. Then add the mushroom, saute again for few minutes.
4. Add in the chicken stock, cream and milk, bring to the boil. Continuous stirring is required. Season with parmesan, salt and crushed black pepper. Turn off heat.
5. Add pasta to sauce. Use enough pasta so that all the sauce is used and the pasta is thoroughly coated. Sprinkle some chopped parsley.Serve immediately.


Friday, February 20, 2015

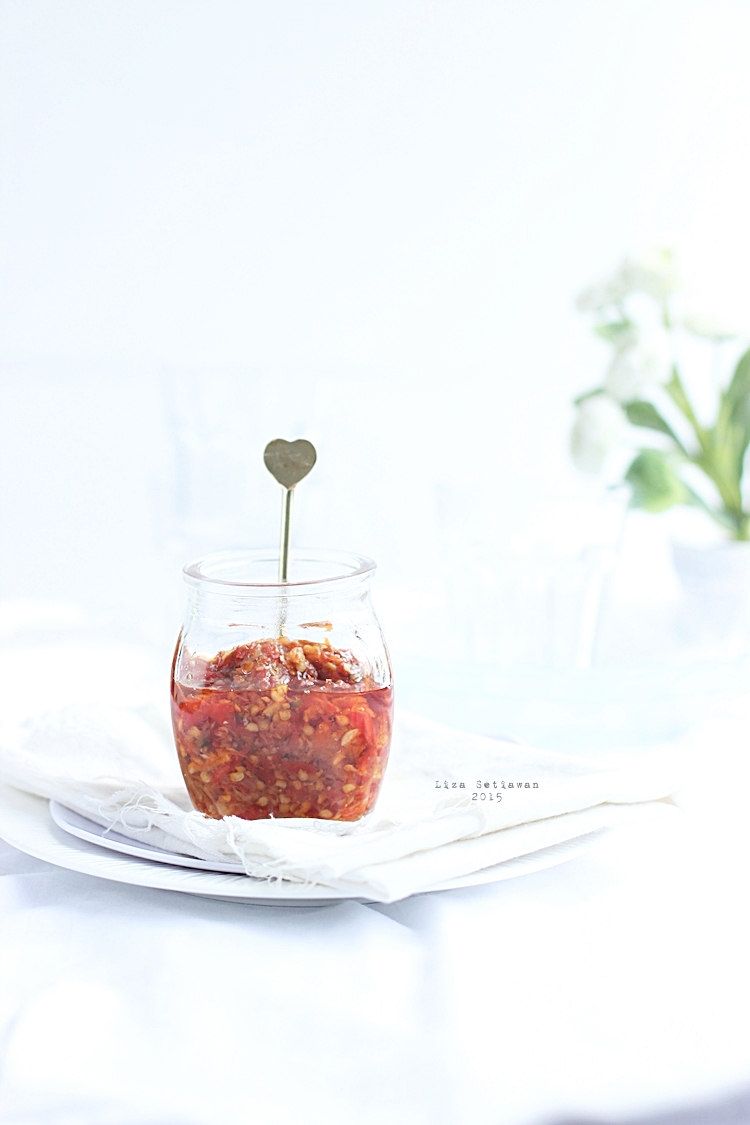
Shallot and Chili Relish


Most Indonesian can't eat without sambal. There are so many varieties of sambal/chili here accross the nation. Each region has its own specialty. In fact, I believe every family has special sambal recipe. 

This shallot relish is one of our favorite sambal, we have it in stock most of the times. You can store this relish in your refrigerator using airtight glass container for 1 month.  Re-heat using microwave before serving. 


I am using 3 different kind of chili in this recipe, the one with the most heat is bird eye chilies. If you think you can't handle the heat, skip this chili or remove the seeds to reduce the spiciness. 


Shallot and Chili Relish
recipe slightly adapted from Rina Rinso

Ingredients:
150 gr of mixed red cayenne chilies, bird eye chilies and green bird eye chilies. 
150 gr shallots
4 cloves of garlic
1/2 tsp sugar
1/2 tsp salt, or depending on your liking
2 tsp of dried ebi (dried small prawn), pan fried (without oil) until fragrant, and mashed finely until it turns to powder.
150 ml cooking oil

Methods :
  1. Peeled, washed and drained the shallots. Set aside.
  2. Remove the stalks from chilies. Washed and drained. Set aside.
  3. Heat oil in a frying pan and cook the chili, shallots and garlic, and the dry ebi powder until it turns a darker shade and fragrant. 
  4. With mortar and pestle, or food processor, grind the chilies coarsely.
  5. Then cook again, season with salt and sugar, cook until the oil colored change to red-ish. 
  6. Turn off heat, let cool and store in a glass container. 

Homemade Green Tea Ice Cream (No Churn)


I hope none of you feel sick with my new post. Another green tea episode *grin*. As I once told you sometimes ago, I am a matcha green tea big fan! I make anything from matcha and never getting tired of it. 


This ice cream is a fantastic treat for sunny days, it has incredibly soft texture and quite strong green tea flavor. Not too sweet, just the way I like it. But it melt easily as I am not adding any other chemical related ingredients. So I dare to say that it is a healthy homemade ice cream.


It is super easy to make, and you don't even need to re-blend them every 2 hours. But if you want to blend it again it will be your choice. I bet it will make it even fluffier.


Ingredients :

1/3 can of white sweet condensed milk
250 ml uht cream
150 ml plain milk
3-4 tsp green tea powder*
1 tbsp maizena

*Matcha green tea powder has so many varieties, so the taste, color, and fragrant will be depending on which brand you choose. Some is more bitter, greener and flavourful than the others. This also related to how much sugar you need to use.

Methods :

1. In a pan, pour the sweet condensed milk, add in the matcha green tea powder using fine strainer. DO NOT SKIP THIS STAGE. Green tea tends to have some lumps, so straining the powder is VERY important. Mix well. Turn on the stove, low heat. Add the plain milk. 
2. Take few spoon of mixture, and mix well with maizena. Add in the maizena mixture and bring to the boil. Turn off heat. Let cool completely. 
3. In a mixing bowl, beat the uht cream using hand-mixer, speed 4, until fluffy (appx 3 minutes). Be careful do not over mix, it might turns into butter!
4. Add the green tea mixture, mix again using high speed for about 5 minutes. Move to another leak-proof bowl or loaf pan covered with aluminium foil. Put it on your refrigerator overnight. Ready to serve. 


Wednesday, February 18, 2015

Thai Ice Tea


One of our favorite drinks during summer! Very aromatic and super easy. All you need is thai tea, ice cubes, water and milk. Please note that Thai tea leaves are so much different than any regular tea leaves. It is basically a black tea, but I have no idea if the fragrant was an addition during the process or anything else. I did sense something smell like star anise and vanilla. It also has this dark orange color, when you mix it with milk it is as orange as the sunset.

Here it is, my version of Thai Tea :
4-5 tsp of thai tea leaves (the more you use, the more orange and the more aromatic)
4 tbsp sugar
300 ml water
250 ml uht plain milk
ice cubes

Directions :
1. Bring the water to the boil, add the thai tea leaves and sugar. Turn off the heat. Let cool
2. Strain the mixture into glasses, add milk and ice cubes. Ready to serve.


Tuesday, February 17, 2015

Tuna Sandwich with Cheesy Mashed Egg


This is going to be a quick post, as I believe everyone can make their own tuna sandwich. The special thing about this sandwich is the cheesy mashed egg. That's it. I am adding an extra value to a simple and humble ordinary tuna sandwich.


It makes the texture more creamy, and instead of only  mayonnaise, I am adding some cheese spread for the mashed egg. Orgasmic!

Ingredients :
6 slices of plain bread/whole wheat bread
Lettuce leaf
Kyuri (Japanese cucumber, or any kind of cucumber)
Sliced tomato (I don't have tomato on my refrig, so this time I skip it)
mayonnaise
chili/tomato sauce

Ingredients for Tuna Melt, mix well :
4 tbsp of canned tuna
1-2 tbsp mayonnaise
ground black pepper

Ingredients for Cheesy Mashed Egg, mix well:
2 hard-boiled eggs, mashed (until the texture is chunky, not too mushy like mashed potato)
1 tbsp mayonnaise
2 tbsp cheese spread
ground black pepper

How To :
1. Toast the bread, spread the mayonnaise and chili sauce. 
2. On one slice of toast, place the lettuce and tuna , cover with a slice of toast. Spread again with mayonnaise or sauce. Place the sliced cucumber and spread the cheesy mashed egg, top it with sliced tomato. Top with last slice of bread. Repeat the process for one more set of sandwich.


Saturday, February 14, 2015

Oven Baked Potato Wedges with Parmesan


Quick Post!

I don't think I need to explain anything about this dish. As it is already known internationally. This is our favorite wedges, soft, a bit chewy, and full of flavour. To make it top notch, sprinkle some grated parmesan upon serving.


INGREDIENTS :
4 large potatoes, scrub clean, cut into chunky wedges. Do not peel the skin!
3-4 cloves of garlic, finely grated
1 tsp salt
1/2 tsp black pepper (trust me, It wont taste as good if you use reguler pepper)
1/2-1 tsp italian pinch, you can exchange this with mix of dry oregano, rosemary, thyme and basil.
3-4 tbsp olive oil
Grated parmesan

METHOD: 
1.In a big bowl, mix the grated garlic, salt, blackpepper and italian pinch.
2. Toss all the wedges, mix it until all the seasoning is spread evenly
3. Leave to sit for at least an hour or two
4. Pre-heat your oven, 180 degree celsius. Line your baking pan with alumunium foil, spray with a little oil. Arrange the wedges and bake with alumunium foil covered for about 35 minutes, or until the potato is fork tender.
5. Open the alumunium cover and bake for 10-15 minutes until the surface is golden brown. Flip all the wedges, bake for another 10 minutes, sprinkle some more salt, pepper and italian pinch if necessary.
6. Remove from the oven, sprinkle some grated parmesan. Ready to serve.

Thursday, February 12, 2015

Fried Cauliflower


It's just a tricky way to make your children eat cauliflower! It might be not so very healthy as it is deep fried. But at least, they dare to try some unknown stuff. My boys thought they eat chicken popcorn, hahahahahah. But the eldest came to realize that it wasn't chicken at all :D Then he refuse to eat more. It is actually pretty good, especially when still warm and crunchy. It doesn't stay crispy for too long as I don't want to add too many un-natural ingredients.


The recipe is the same as fried enoki. Thing that really need your attention is, make sure that your cauliflower is dry. So the crisp stay longer. Don't forget to soak the cauliflower with salt water for about 5-10 minutes. Rinse again and pat dry.

Ingredients: 
1 bunch of cauliflower, cut the core, wash and drain. Pat with kitchen towels
150 gr all purpose flour
35 gr corn starch
15 gr white rice flour
½ tsp garlic powder
1 tsp salt
¾ tsp baking powder

For marinating :
1 egg
50 ml water
½ tsp salt
Ground pepper

Cooking oil for deep frying

How to :

Mix well  the flours, garlic powder, salt and baking powder

Soak the cauliflower into the marinating liquid, then roll to the flours mix. Pat a little so the flour  stick to the mushroom

Deep fry with small-med heat until golden brown.

Wednesday, February 11, 2015

Glazed Strawberry Bread


Have you ever tried a strawberry bread? Well, for me, this is my first time ever! I usually bake banana bread or pumpkin bread. Not strawberry 😁. So when I surfed my favorite recipe blogs and stumbled upon this recipe, I feel excited. You know, I love glaze! And Sally's word sounds so promising! 


When it comes to strawberry, only 3 people would eat it at my house, as my eldest doesn't like strawberry in any forms. But his little bro, he ate everything that tastes good. Haha. He loves strawberry, even when it is sooo tangy, he'll still eat it. But he usually ask for some chocolate sauce to dip in. 

After reading the review, I am soooo going to make the bread. Especially because Sally thinks that the bread is moist. Very important issue for me, I don't enjoy dry texture cake, it makes my throat itchy and makes me want to drink a gallon of water afterwards. 


This bread taste like heaven in my mouth. Burst with flavor. It is a whole different experience for me. I can't stop munching over it, until I realised I haven't take a single photo of the sliced bread 😅. So sorry for the incomplete report. If you are using ripe and sweet strawberry, you might want to cut the sugar amount a little bit. As when you combined the bread with the glaze, it become sweeter. My strawberry is tangy, so I follow the recipe to a T, and very satisfied with it.

Glazed Strawberry Bread

2 cups (250g) all-purpose flour (accurately measured)
1 teaspoon baking soda
1/2 teaspoon salt
1/4 teaspoon ground cinnamon
1 large egg, at room temperature
3/4 cup (150g) granulated sugar
1/4 cup (50g) light or dark brown sugar (I am using palm sugar)
1 cup (240ml) buttermilk 
1/3 cup (80ml) vegetable oil
2 teaspoons vanilla extract
1 and 1/2 cups fresh strawberries, rinsed, dried, chopped, and tossed in 1 Tablespoon of flour

GLAZE
1/2 cup (120g) confectioners' sugar
1/2 teaspoon vanilla extract
3-4 Tablespoons (30ml) heavy cream or milk
Directions:

Preheat oven to 180C degrees. Spray a 9x5 loaf pan with nonstick spray. 

Make the bread: In a large bowl, toss the flour, baking soda, salt, and cinnamon together until combined. Set aside. In a medium bowl, whisk the egg, granulated sugar, and brown sugar together until combined. Make sure there are no brown sugar lumps remaining. Whisk in the buttermilk, oil, and vanilla. Slowly pour the wet ingredients into the dry ingredients and gently whisk until there are no more lumps. Try very hard not to overmix, which will result in a tough textured bread. Fold in the strawberries.

Bake the bread for 45 minutes to 1 hour. I cover the bread loosely with aluminum foil after 30 minutes to prevent the top from getting too brown. Poke the center of the bread with a toothpick at 45 minutes. If it comes out clean, the bread is done. If it comes out wet, bake longer. Oven times will vary. Let the bread cool completely before glazing.

Make the glaze: Whisk the confectioners' sugar, vanilla, and cream together until combined and creamy. Drizzle over bread immediately before serving.

Potato Doughnut


Nothing beats the sizzling-hot-from-the-fryer homemade donuts! It is easy to fallin love with doughnuts. But no matter how tasty branded doughnuts out there, this simple potato doughnuts never fails to entertain my family. My kids prefer this dougnuts, rather than the one we usually bought at the mall. Happy happy me! 


This doughnut is incomparable with branded one. As there is a super duper special ingredients. Which is : L O V E. My eldest son,who is now 8 years old, cannot forget the first time he tastes my homemade doughnuts. And he remembers how he enjoys eating doughnut while it still warm. The sweet sugary topping is his alltime favorit. He never interested to try the chocolate topping, choco rice and so on. Powder sugar and only powder sugar. That is it. As for me, I like to add 1/2 tsp of cinnamon powder to the powder sugar. More aromatic!


I am making these beauties with my younger son, he is 3 and 1/2 years old. So pardon me for some ugly looking doughnuts. He is so excited to make dough balls! Some of it were quite circle, some looks like a whole different shape....:D It took patience for me to set it back to circle, haha.


POTATO DOUGHNUT
Recipe Taken from NCC

Ingredients:

500 gr   bread/pizza flour
50 gr     milk powder
11 gr     dry yeast
200 gr   potato, steam until tender, and mashed until soft and no more lumps.
100 gr   sugar
75 gr     butter
½ tsp    salt
4 egg yolks
100 ml   cold water (if you not using milk powder, cold water can be subtitute with fresh milk)

Methods:

I use bosch mixer. Mix flour, sugar, dry yeast untill well mixed. Add in the potato and water/milk. Set to speed 3. Keep kneading until abit elastic. Add in the margarine and salt. Knead until the dough is smooth and elastic and doesnt stick to the bowl.
Let sit for about 15 minutes or until dough doubled the size. Covered with damp kitchen napkin.

Punch the dough, divide into balls of 50-60 grams each. Depending on how big you want your donuts. Let sit for 15-20minutes. Pin the center to make the whole, or you can use donuts cutter to make it easy.

Heat the oil in the pan. It is a bit tricky to fry. Make sure the oil is hot enough, use small heat! You don't want to eat half done donuts. When you use medium heat, the skin is already brown before they are fully done. Avoid flipping the donut over and over again. It will cause the donuts oily. Wait until one side is golden brown (about 3-5 minutes ) take a peek and flip. Apply the dusting.


Ready to serve.

Wednesday, February 4, 2015

Green Tea Layer Pudding


I hope you don't feel sick of another green tea recipe :D

I am not going to explain how much I adores green tea, you must get bored and snoring in the count of 10, haha. The smell, taste, oooh so intoxicating. Worry not, I know that we all should be careful with our caffeine intake. But hey, I have never consume caffeine more than once a day. And again, green tea makes this pudding sooooo irresistible! 


If you like smooth pudding, do not omit the use of egg yolk and maizena. But if you're nose is ultra sensitive to yolk smell, just skip it. Use only the maizena. 

INGREDIENTS :

1 sachet of agar-agar powder (7gr)
125gr sugar
1 can of evaporated milk 
250ml plain uht milk
water, until all combined, total of 1 L liquid
1 egg yolk
2 tsp of maizena
3 tsp of matcha green tea powder*

*The amount of green tea used in this recipe may vary depending on what brand you use. 

how to :
1. Prepare a pan, use a low heat position on your stove
2. mix the agar-agar powder with the sugar, water, and milk. Stir the mixture until it almost boil. Frequent stirring is needed.
3. Add about 4 tbsp of the mixture to egg yolk, mix well, and then pour it to the rest of the batter and stir well until it comes to the boiled, do the same thing to the maizena.

4. Divide the mixture into two separate pans, 700ml for the green tea mixture. Take 4 tablespoon of the mixture and mix well with the green tea powder. Pour to the remaining mixture with fine strainer. Do not skip stage! Green tea powder has small lumps!
5. Turn off your stove, wait until all the steam gone. 
6. Pour some of the green tea batter to your mold, wait until it has thin skin on the surface then add the milk mixture carefully. Repeat process until done. Let cool completely. Refrigerate and serve cool.

Tuesday, February 3, 2015

Milky Orange Pudding


My boys loves pudding, well, I guess almost all kids do, rite? In Indonesia, pudding is not like pudding in other continents. Here, we use agar-agar powder which made from algae, where in Japan they call it Kanten. 

I've made pudding similar to this one before, but I guess it won't harm anyone if I post the almost the same recipe :D. Anyway, this pudding doesn't have layers like the previous. The taste is a bit sour (in a good way). It will depend on the type of orange juice that you use, or you can simply use orange drink powder. I add a teaspoon of jelly powder to get the chewy-like texture. 


INGREDIENTS :
1 sachet agar agar powder (7gr)
1 tsp jelly powder
500 ml plain milk
500 ml orange juice, or if you use orange drink powder, use 4 sachets, mix with 500ml water.
4 tbsp of sugar, please note that the amount of sugar should be depending on how sweet/sour your orange juice.

How to :
Prepare a pan, turn on your stove, medium heat. Mix together agar and jelly powder and milk, bring to almost boil. Continuous stirring is needed. Then add 
the orange juice, bring to the boil. Turn off stove. 

After the steam's gone, pour the mixture to your mold carefully. Leave cool at room temperature. Put the agar in the refrigerator. Ready to serve once cold.