Tuesday, August 12, 2014

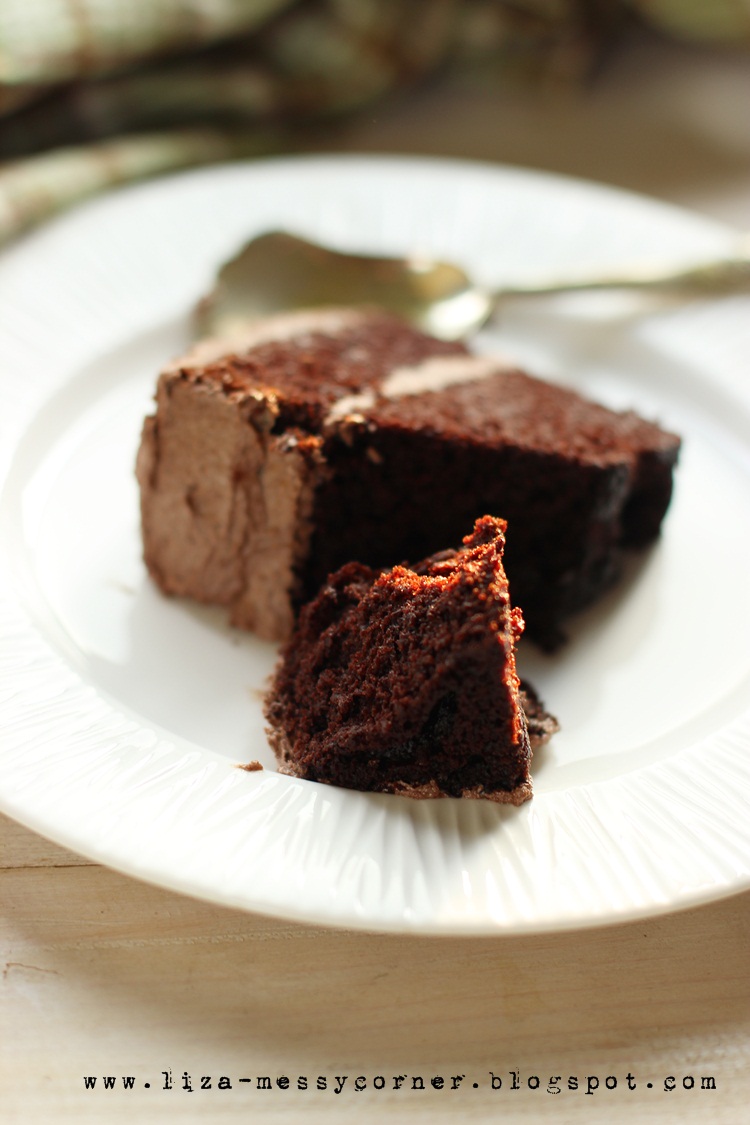
Moist Banana Chocolate Chip Crumb Cake


From the title above, can you tell or imagine how good it is? 

Here is the thing, I guess some of my reader might know well that I'm into baking banana. But this one, dang! You have to try it! I mean it.


Cinnamon, palm sugar, choco chip and almond streusel. Something wrong with that words? Yes there is, they are the ingredients for the crumbs a.k.a streusel. Not just as sprinkle on top of the cake, but also as a layer. Can you imagine that? The only wrong thing is, we cannot stop eating it. My oh my, I don't dare to look at my scale for a week after. They are soft, moist, delectable, and soooo decadent. I did make some changes to the recipe. The original recipe doesn't required almond powder and I reduced the amount of choco chips. Oh ok, enuff with my bla bla. Go to your kitchen and collect your ingredients to bake this.  


Though my pics doesn't give fair explanation about how good it is, trust me.


INGREDIENTS
source : Sallys baking addiction. Modified by me

1 and 1/2 cups (190g) all-purpose flour
1/2 teaspoon ground cinnamon
3/4 teaspoon baking soda
3/4 teaspoon baking powder
1/4 teaspoon salt
75g unsalted butter, room temperature
1/2 cup (100g) granulated sugar
1 large egg
1 teaspoon vanilla extract
1 and 1/2 cup mashed bananas, very ripe (about 3 large bananas)
1/4 cup (60g) yogurt

STREUSEL
1 Tablespoon ground cinnamon
1/4 cup palm sugar
1/2 cup semi-sweet chocolate chips
1/3 cup ground almond

Directions:
Preheat oven to 180 C degrees.  Smear with butter an 20cm square pan.
In a medium bowl, toss the flour, cinnamon, baking soda, baking powder, and salt together.  Mix until well combined. Set aside.
Using a handheld, beat the butter on high speed until creamy, about 1 minute. Scrape down the sides and the bottom of the bowl as needed. Switch the mixer to medium speed and beat in the sugar until combined. Beat in the egg and vanilla extract, scraping down the sides and bottom of the bowl as needed. Add the mashed banana and yogurt and turn the mixer on high and beat until creamy, about 1 minute. Turn the mixer off and pour the dry ingredients into the wet ingredients. Turn the mixer on low and slowly beat until combined. Do not overmix.
Make the streusel by combining all of the streusel ingredients into a small bowl. Layer half of the batter into the prepared baking pan. Top with half of the streusel. Repeat with the rest of the batter and streusel. Bake for 40-50 minutes, covering the cake with aluminum foil after 25 minutes to prevent the edges from browning too quickly.  Test  with a toothpick; if it comes out clean, the cake is done.
Allow to slightly cool for ten minutes before cutting and serving.


Saturday, August 9, 2014

Banana Muffin with Lemon Glaze


have this thing about banana muffin. I love to bake it so much. I'm obsessed!  I've tried so many banana muffin recipe, and decided to make a little experiment with my own ingredients. With this recipe, I already make 3 batch in 3 different moments. I guess that's enough to explain how good it is. 
I'm not going to bored you all with my messy writing. I believe those of you who enjoys banana muffin knows that whenever ripe banana and yogurt include on the recipe, it will be super moist and yummy.


 Feel free to make half of the recipe, as one recipe makes 12-14 muffins, depending on your muffin cup size. The key is to use very ripe banana, you know, with lotsa black spots on the skin :)

Here is the recipe :
6 medium size banana, mashed (appx 2 cups)
3/4 cup vegetable oil
3 eggs
100 ml plain yoghurt
1 cup of sugar

2 cups of flour
1 tsp baking powder
1 1/2 tsp baking soda
1/2 tsp salt
1 tsp vanilla (optional)

Lemon glaze, mix together :
1/3 cup of powder sugar
2-3 tbsp of lemon juice


How to :  
Heat your oven, 180 celsius degree

Mix together flour, baking soda, baking powder and salt. Set aside

Mix mashed banana and sugar, add oil, then add egg and yoghurt. Mix until well combine

Pour the dry ingredients to wet ingredients, mix until just combined. Do not overmix or your muffin will be tough!

Pour the batter into muffin cups, bake for about 20 minutes.


Lemon glaze : mix together the powder sugar and lemon juice. The consistency should be like shown on the above picture. Wait until the muffin is cool at room temperature before apply the glaze. Sprinkle some lemon zest. 


They are perrrrrfecto! the muffin is soft, moist and a little crumbly. It is not overly sweet, and the glaze combined perfectly with the sweet banana taste. It awakes your senses, sweet with a little sourness from the glaze. Highly recommended!

Thursday, August 7, 2014

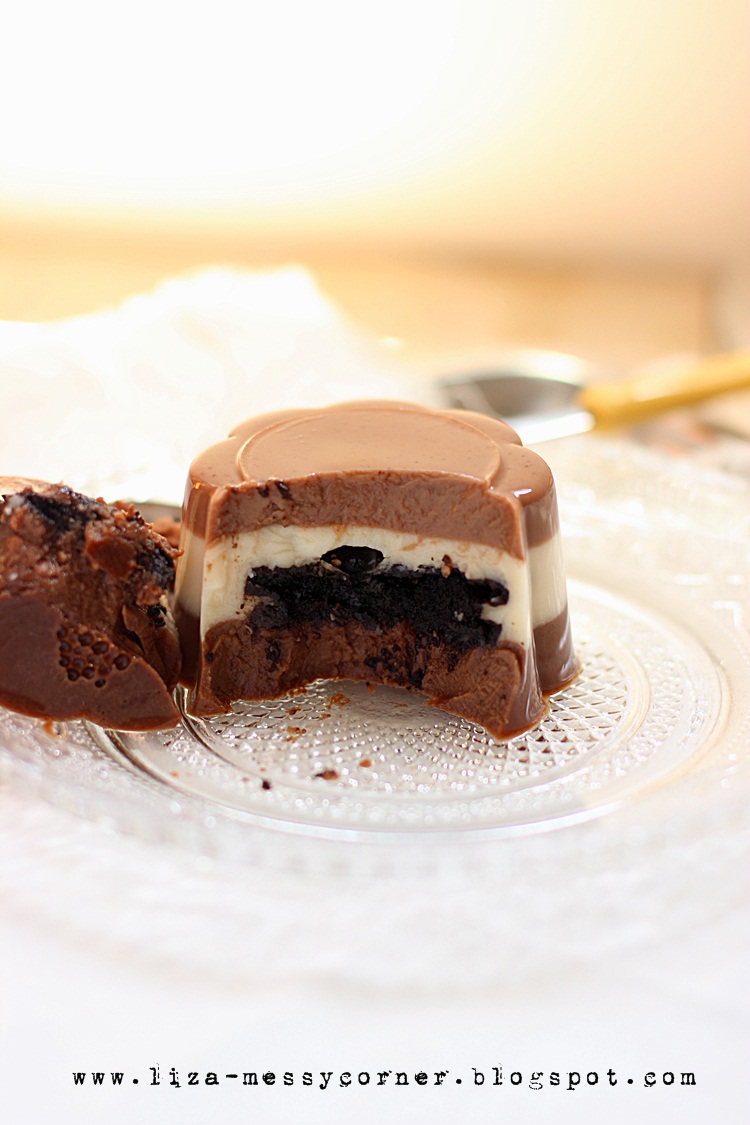
Milo and Oreo Pudding


Like any other pudding, this one is my boys' favorite. Well, as long as milo involved in the recipe, its almost impossible for them to reject it. And oreo? To be honest, long time ago, I'm not a fan of oreo. Don't even like it! its too sweet for my tongue. I even not letting my eldest to try this biscuit. But my hubby, who is a big fan of oreo, sometimes accidentally eat the oreo when my son is passing through. He doesn't make any responds, but after 2 or 3 times, he did asked his dad what that was. And then he try it. And he screams because its too sweet. Then he try again, again n again. And he loves it. He was 5 years old that time.  
There were times when he wants oreo as his snack, but thank God it is now history. He is now 8 years old and full of conscience *big grin*. At least everything that I told him, actually remains in his mind. He knows that he couldn't get as much oreo as he wants, he doesn't want to get his tooth-ache, and he wants to stay healthy. Attaboy!


Ooh and my hubby the big fan? he also heals from his addiction. Now,in our home, oreo is an additional happiness. Just an extra for our muffin, a variation. We do enjoy our oreo sometimes, but in an appropriate and decent way (is there any decent way of eating oreo? mind your "black" teeth after you eat it :D)


So when many blogger friends, including mba Hesti work of art and Teh Ayu Momylicious, make this pudding, I'm feeling curious and interested to try too. I have bookmarked the page for so long, and finally got the chance (and time) to make it. Special thanks to diligent fellow bloggers! As for the taste, in my opinion, they are not too bad, not my favorite either. I prefer soft pudding. So if you're a fan of soft n smooth pudding, add egg yolk to the batter, it will help to make the pudding's texture softer. But don't worry, despite my so so feeling to this pudding, my boys looove it. So I guess there will be the second or third batch of this pudding. 


INGREDIENTS :
Original recipe from HomeKreation, modified by me

1 pack ( 10g Agar-Agar Powder)
800 ml water
120 gr sugar

1 can (400g) Evaporated Milk
2/3 cup Milo Powder

1 full table spoon of chocolate powder
1 table spoon maizena
1 pack (137g) Oreo Cookies - break into small pieces but keep the sandwich together 

HOW TO


1. Place agar powder and water in a pan/pot cook until all powder is dissolved.
Add in sugar, cook until sugar is dissolved.
Add in milk, stir well. 

Get about 2-3 tablespoon of mixture, pour it to a bowl. Add in the maizena, mix until well combine, then pour it to the stove. Turn off fire once boiled.

2. Separate 2 cups of the mixture into another cooking pot add in Milo and chocolate powder
Stir well until milo is dissolved.

3. Pour 1cup of Milo mixture into a pudding/jelly mold and let the remaining half warm up on smallest fire.

wait until there is thin skin on the surface.

Pour the milk mixture on top, then sprinkle the oreo cookies. Let the surface set.
Pour the remaining milo mixture.

4. Let it set completely at room temperature. Put it in a fridge. Serve cold.

Monday, August 4, 2014

Soto Bandung


My mother comes from West Java, Bandung to be precise. So in our home, my mom used to make lotsa sundanese style food. They are amazing! You know, if javanese food is famous for the sweet taste, sundanese food is mostly savory and a bit spicy. And this clear soup is one of my family's favorite. No hassle. You don't even need to grind the ingredients. All you gotta do is smash the ginger, garlic etc with the side of your knife or smash it a little with pestle. Simple isn't it? Yet the taste is sooo good. Light and full of flavour.


Btw, Indonesia as an archipelago country, it has so many different cultures, tribes, and of course food. Including soto, it will easily recognize by the name mentioned after soto. For example, Soto Bandung. Of course its origin is from Bandung. Soto Betawi, comes from Betawi, Betawi/Batavia known as Jakarta now. Coto Makasar comes from Makasar, Soto Padang comes from Padang, West Sumatra, and so on.

Do give this Soto Bandung a try. This recipe is from my beloved mother. 


Ingredients :

500 gr shank beef, cut into 3x3 cm or according to your liking.
2,25 L water
8 cloves of garlic, mashed
3-4 cm of fresh ginger, mashed
4 cm galangal, mashed
2 lemongrass, mashed
3 bay leaves
2-3 tbsp of vegetable oil
2-3 tsp of salt
3/4 tsp ground pepper 
300 gr daikon, cut into about 0,5 cm circle


boiled chili sauce, boiled the following and the blend until smooth. 
-4 red cayenne chilies
-2 bird eye chilies
- juice from 1 lime
- salt 
- a pinch of sugar
- about 70-100ml of water


Garnish and accompaniments :

2 handfuls of soybean. Soaked into water about 30-45 minutes until it skin looks chipped. Drain with paper towel and deep fry until golden brown. Use low heat as they got dark easily, make sure the oil is hot.

1 bunch of scallion, thinly slice
1 bunch of chinese celery, thinly slice

sweet soy sauce (optional, I never use soy sauce for this soto, but some prefer adding a tsp or two of sweet soy sauce. Its your call)


HOW TO :
1. Bring to the boil the shank beef, and simmer for about 1 hour until the beef tender. Or else use pressure cooker to finish faster. 

2. Heat the oil in a frying pan, sautee the mashed garlic, ginger, galangal, lemongrass and bay leaves until fragrant. Transfer to beef soup.

3. Season the soup with salt and pepper.

4. Add the sliced daikon, bring to the boil and turn off the heat.

5. Serve with fried soybean, sliced celery, sliced scallion, sweet soy sauce and boiled chilies.

Tuesday, July 22, 2014

Asinan (Indonesian Style Fruit Pickle)


Asinan is Indonesian style pickle of fresh vegetable or fruits. The term asinan comes from the word asin, means salty. It is actually not only salty. But sour and spicy too!

If you are not into spicy food, you can easily adjust the level of spiciness by reducing the amount of chilies, or you can remove the chili's seed, it will help to reduce the heat a little. Or else, you can use other type of chilies that is not too spicy. Me and my hubby love spicy food, and we choose the type of chili that is famous in Indonesia as "super spicy". It is probably around the same level of jalapeno and habanero pepper.

Ingredients:
3 cups of water
6 red cayenne chilies
3 bird eye chilies
2-3 tbsp vinegar
lemon juice from 1 lemon
1 and 1/2 tsp salt 
1/2 tsp sugar

2 cucumbers
1 jicama/yam/mexican turnip
1 pineapple
2 handful of peanut, deep fry


How to :
1. Cook the chilies with boiling water about 5 minutes. Remove from the water and grind until smooth. You can use mortar and pestle or blender.
2. Mix the chili paste with 3 cups of water, salt and sugar. Add the vinegar and lemon juice, have a taste, correct it as your prefer. As different type or brand of vinegar might not taste the same. Adjust the level of sourness. It should be salty-sour and a little sweet.
3. Put in all the cucumber, jicama, and pineapple pieces to the sauce. Let it cool completely. Put it in your refrig, and your asinan is ready after about 1-2 hours.
4. Sprinkle the fried peanut before you eat it.


Monday, July 14, 2014

Triple chocolate layer cake


I feel so sorry that I haven't upload this cake from last month. This was my little boy 3 rd birthday cake....

You see, this is my very first time baking birthday cake! Never in my entire life have I done this before. All this time, when it comes to birthday cake, we always buy from our favorite store :D  The thing is, I dont have the tools to make pretty looking cake, nor the baking pans! I have a 20cm round pan and a 20cm square pan. Sigh....however, I decide to continue my plan to make the cake. There is always a first time for everything. I don't know what to do with the different shape's pan, but heck...lets just do it! When the cake is ready, I then cut all the square edges of my chocolate cake to be stack with the round cake. Ohhh my gosh it was disastrous. Haha! So I did everything I can to cover the mess. For more, they are not even on the same height. The round cake is thicker than the square. 

As for the taste, it rocks! So very moist, and rich and chocolatey. Just the way I  like it. And the birthday boy? he looooooves it! Yeayyyyyy. I'm planning to share the cake with my nephew and nieces who regularly visit our home on the weekend, that is why I make the cake on Friday, a day after my boy's bday. Hoping that it will still be enough cake to share on saturday. Too bad they don't get a chance to taste it :D All the cakes are gone before they came :D My two boys looove it so much they even lick the homemade buttercream. Which they never did before! Of course I'm super happy, despite the cake appearance look a bit horrible, they are fantastic!

The cake use oil, and I think its perfect. You don't need butter smells to make this cake more delicious. And for more, oil always make cake more moist than butter!


ChoCOLATE LAYER CAKE
Cake adapted from Ina garten, via Sally's baking addiction

 1 and 3/4 cups (220 grams) all-purpose flour
1 and 3/4 cup (350 grams) granulated sugar (I use 300 grams of sugar)
3/4 cup (95 grams) unsweetened cocoa powder (not dutch processed)
1 teaspoon baking powder
2 teaspoons baking soda
1 teaspoon salt
1 cup (240 ml) buttermilk
1/2 cup (120 ml) vegetable oil 
2 large eggs, at room temperature
1 teaspoon vanilla extract
1 cup (240 ml) freshly brewed strong hot coffee

CHOCOLATE FROSTING
1.25 cups (2.5 sticks or 290 grams) unsalted butter, softened to room temperature (I use 1 cup)
3-4 cups (360-480 grams) powdered sugar (I only have 1 and 3/4 cup powder sugar)
3/4 cup (95 grams) unsweetened cocoa powder (I use 1/2 cup chocolate powder)
3-5 Tablespoons (45-75 ml) heavy cream 
1 teaspoon vanilla extract
1/2 - 3/4 teaspoon salt (to taste)


Directions:
1.       Preheat oven to 180C degrees. Butter & flour two 20cm round cake pans, or use non-stick spray.
2.      For the cake: Sift together the flour, sugar, cocoa powder, baking powder, baking soda, and salt in a medium sized bowl. Set aside.
3.      Using a handheld or stand mixer on high speed, mix the buttermilk, oil, room temperature eggs, and vanilla in a large bowl until combined. Slowly add the dry ingredients to the wet ingredients with the mixer on low. Add the coffee. The batter will be VERY thin. This is ok.
4.      Pour the batter into prepared baking pans and bake for 23-27 minutes or until a toothpick inserted in the center comes out clean. 
5.      For the frosting: Cream the butter with a hand mixer on medium speed for 3-4 minutes. This will create a nice creamy base for the frosting. Add 1 and 1/2 cups of powdered sugar and 1/2 cup of cocoa powder. Mix on low. Add 4 Tablespoons of heavy cream and 1 teaspoon of vanilla extract. If your frosting is too thin, add up to 1 more cup of powdered sugar. If your frosting is too thick, add up to 2 more Tablespoons of heavy cream. Add at least 1/2 teaspoon of salt. Taste the frosting and add more salt if the frosting is too sweet. Add more cocoa powder if the frosting is not chocolate-y enough. _Frosting recipe is forgiving. Add more/less of each ingredient to obtain the consistency and taste you desire._
6.      Place 1 layer, flat side up, on a plate. With a knife or offset spatula, spread the top with frosting. Place the second layer on top, rounded side up, and spread the frosting evenly on the top and sides of the cake. Decorate with anything you desired.
7.      Cake stays fresh, moist, and soft at room temperature (covered) for up to 4 days. Cake may be refrigerated (covered) for up to 7 days.


 Sorry for the horrible pictures, I promise to post better photos if I bake this cake again :)

Sunday, July 13, 2014

Napa Cabbage Stir Fry


Very simple stir fry. One of my family's favorite dish :)

Ingredients :
1 napa cabbage (Indonesian : sawi putih), cut into 4-5 cm squares
4 cloves of garlic, thinly sliced
4 onions, thinly slice
2 chilies (optional), cut 
150-200 ml water
3 tbsp of cooking oil
1 tbsp of light salty soy sauce
1 1/2 tbsp of fish sauce
1 tsp of salt
pinch of sugar

1 handfull of fried mini anchovies for garnish.


How to:
1. Heat oil in a frying pan, sautee the garlic and onions for about 2 minutes, add the chilies. Wait until fragrant.
2. Add the napa cabbage, saute for a minute, add the salty soy sauce, fish sauce, salt and sugar.
3. Pour water, stir and bring to the boil. Turn off heat. Transfer to serving plate and garnish with fried mini anchovies